The Secret to Creating a Styled Stock Photo
Hello Everyone! I’m Krista and I’m taking over the She Sells Studios blog and Facebook page today as part of the Stock Photo Challenge. Please check out my introduction video below and don’t forget to “vote” for my stock photo by liking my posts! -Krista
How to make and use a DIY Lightbox
Creating your own light box for still or stock photography is very easy and inexpensive. For less than $5.00, you can light your products like a pro. Check out my How To video below.
https://www.youtube.com/watch?v=9LF2PmmDdTQ
Now that you have created a light box, you need to know how to use it. This tutorial by Tuts+ gives a great explanation of how to use a light box properly.
Natural Lighting
You don’t have to have a light box to create great images. Using natural light and some resources from around your house, you can easily create a great image.
Arranging a Stock Photograph
When it comes time to arrange a stock photograph, you have to play around with your objects. I found various office supplies from around my own office to use for this challenge. Since I happen to love aqua and mint, most my objects grouped nicely. I’ve created a video of how I grouped and layered objects to create a stylized stock photo.
Finalizing the Image
When I was in college, I would use my school’s Adobe Photoshop resources. When I got older, I realized that owning a full version of the software didn’t make fiscal sense, so I went to the next best option, Photoshop Elements. There are many resources available to learn how to use the program and most of the introductory information translates well over to Adobe Photoshop Elements. I would highly recommend Scott Kelby’s books if you need a way to start learning how to use the software.
Stock Photo
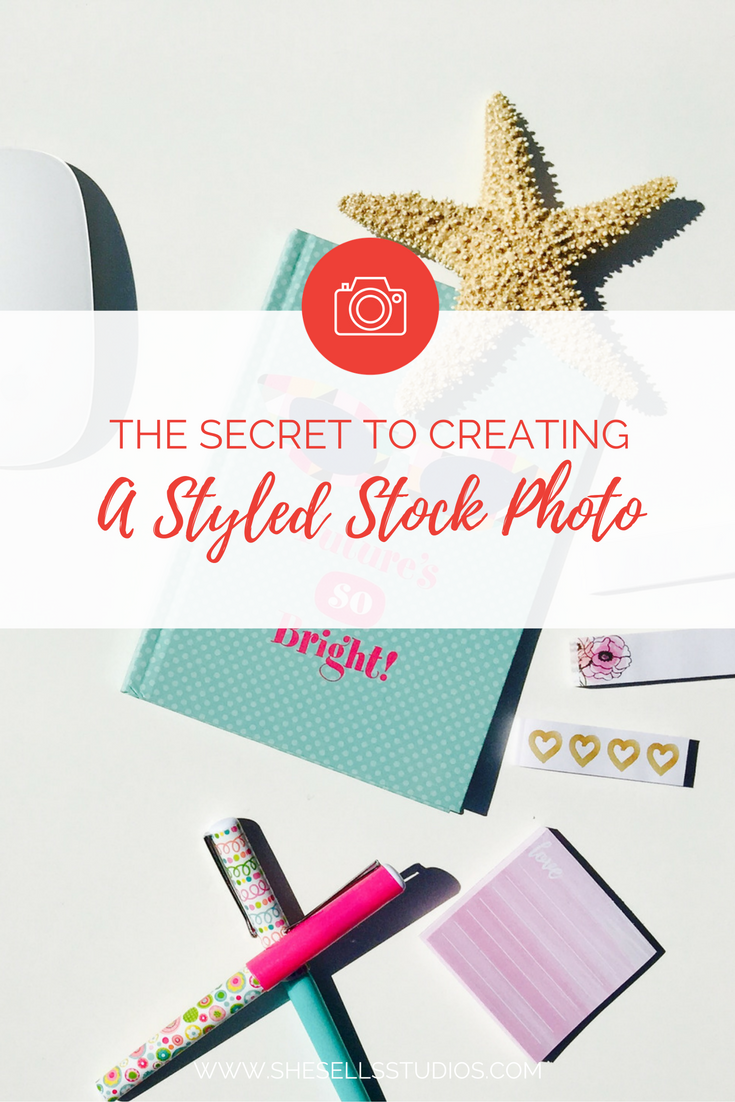
 Here is my final image I created using the information I posted today. It was my first try creating a stock photo, and I’m glad She Sells Studios gave me the motivation to give it a go. Thank you to Rae and Jenny for the opportunity to talk with you today, and don’t forget to “vote” for my image by liking my picture! Thank you!
Check out more of Krista’s projects on her blog: The Dabbling Crafter.